The first time I saw the aurora was last year when I ventured all the way from the bottom of the world to the top of the world. It took 5 flights and about 2 entire days to get there from Australia. I’m sure it doesn’t actually take that long, we just had a problem with our flight from Hong Kong to London and had to stay the night in Hong Kong while they fixed the plane! ? No, I wasn’t freaked out much when they said after an hour into the flight that we have to go back as there is a problem with one of the engines! Ok, I lie, I was shitting bricks to put it bluntly! But that’s a story for another day!
So we finally made it all the way to Lofoten in Northern Norway. It was March and prime time for seeing the aurora. I really wasn’t getting my hopes up that we would see it because I know that it’s rare but I was secretly hoping that we would.
On the second night of our time spent in this wintery wonderland which you can read about here it happened. I had done a bit of research before hand to make sure I knew what to look for and how to spot it and I had the Aurora Alerts App on my phone that I was checking regularly.
I was under the impression that it only came out after about midnight but at about 9pm after a long day exploring the Lofoten area we were about ready to go to bed when I heard someone walking around outside our cabin in the snow.
We looked out the window to see who it was and it was someone staying in another cabin. I’m not sure what they were doing out there but so glad I heard them and looked out the window. I looked across to the mountains that I could see outside and noticed a faint white cloud sitting just above the mountain.
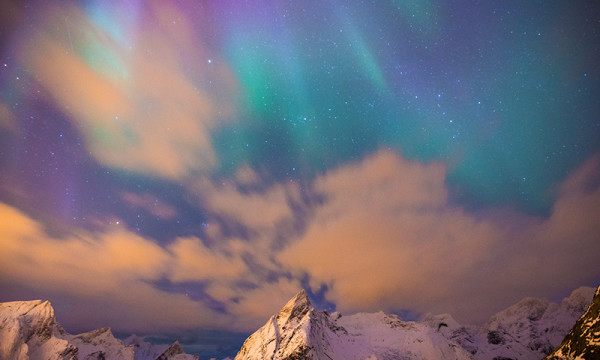
If you don’t know anything about photographing the aurora you may be surprised to know that it actually looks white when it’s not very strong. It almost looks like a cloud. But then as it gets stronger the colours start to appear.
I thought that I could make out a tiny faint line of green just above the mountains and below this strange looking white cloud. My partner went outside to take a test shot on my camera ( I didn’t feel like putting 5 layers of clothing on unless it was the real deal!). The camera can pick up the aurora before the naked eye can. Some photographs that you see of the aurora weren’t even visible to the naked eye but by doing a long exposure it shows up on the camera’s sensor.
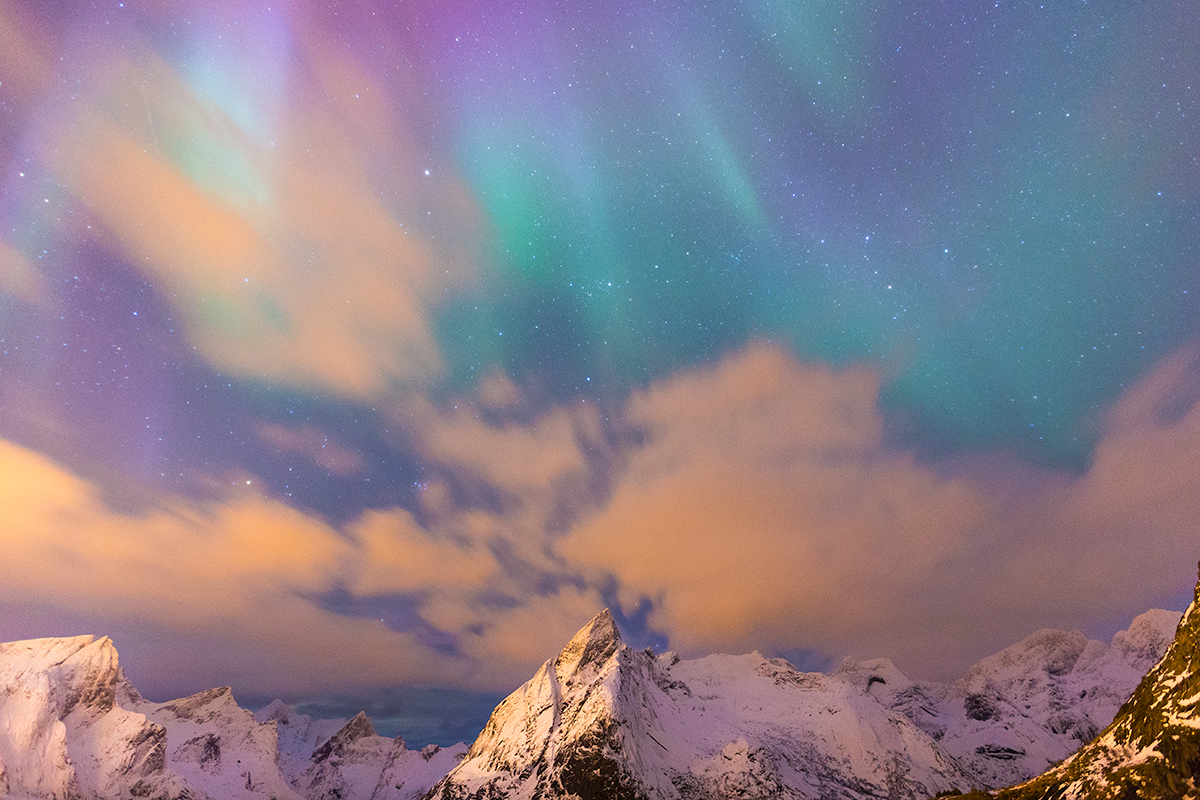
He came back in after a few minutes and we had a look at the LCD screen on my camera and it was definitely the aurora. That white cloud that I could see was turning green. So we furiously put on all the clothes that we owned, grabbed all the camera gear and ran out to the edge of the fjord to start snapping away.
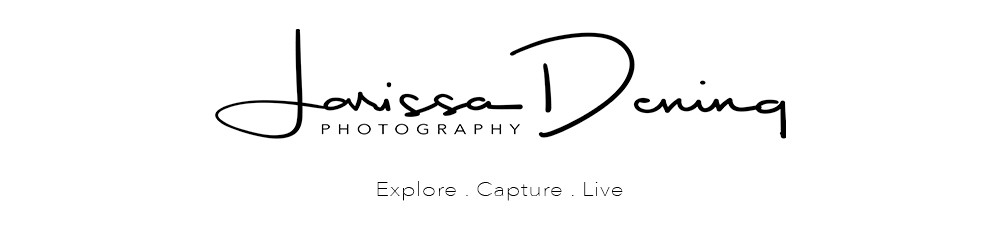
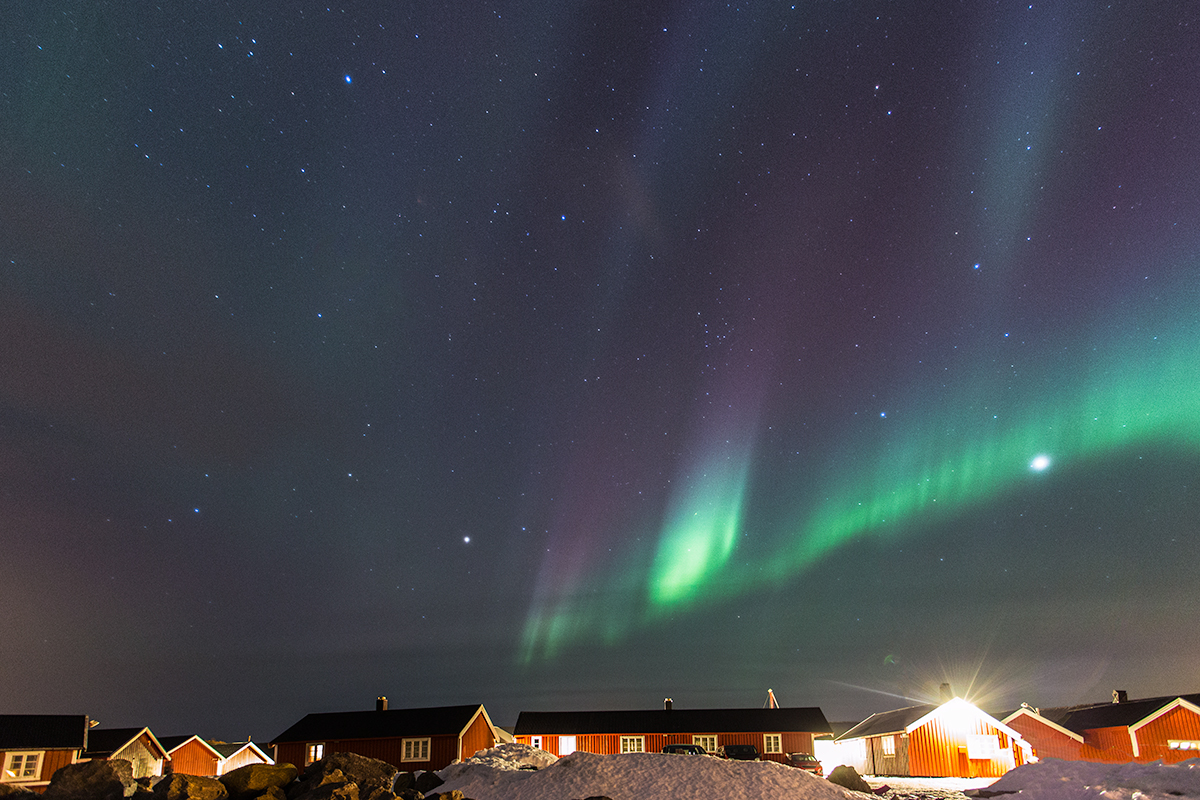
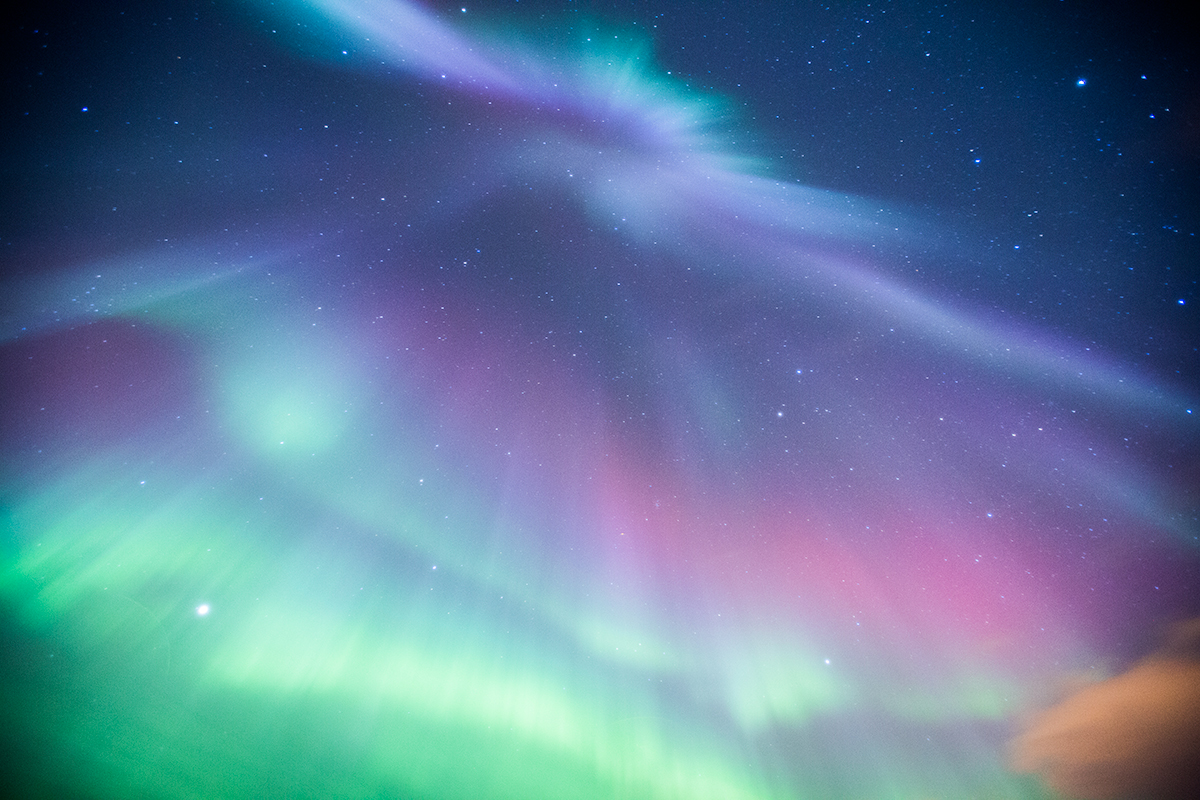
The colour just kept getting stronger and stronger and started dancing across the skies. It was the most magical thing I have ever seen and something that I wont forget in a hurry. I’m so glad I also have the photos to look back on and remember that awesome night.
So how do you actually capture this magical beast? Let me tell you!
Tracking the Aurora
- As I said above, you need an app like Aurora Alerts to know if there are predictions of the aurora for that night. The aurora is around all the time but of course it is only visible when the sky is dark. The forecast for the aurora that I saw in Lofoten was only a 4. If it’s predicting a 6 or 8 then you are in for a real treat!
- You need to be somewhere close to the poles. Norway, Iceland, Finland, Northern Canada, Northern Scotland etc for the Northern Lights. Tasmania, and the South Island of New Zealand for the Southern Lights.
- The best months for viewing the Northern Lights is between September and April, usually October and March are the best months. For the Southern Lights the Aurora is visible between April and September with July and August being the best months.
- Some years are better than others. The aurora runs on it’s own cycle and some years there is very little activity. Other years there is a lot. At the moment we are on the backside of Solar Cycle 24 so the sunspot count is declining (sunspots being released = aurora activity). There is still a lot of potential for 2017 though and I know there has been some activity around Banff in Canada of late. It’s actually quite rare to see the aurora that far down into Canada.
- Best times to see the aurora is between 11pm & 2am. They can come out at any time of the night like my story above when they were out at 9pm.
Equipment you need:
- A sturdy tripod to start with. You will be doing long exposures so you don’t want any movement of the camera.
- A DSLR or a camera with manual mode.
- If you don’t have a 2 second timer on your camera, then you need a shutter release.
- Preferably a wide angle lens.
- Warm clothes
Settings to use:
- Manual Mode
- The biggest aperture that you have. The bigger the better for capturing as much light as you can. F2.8 is perfect but F4 can also do the job if you don’t have anything bigger.
- Shutterspeed anything from 20 seconds to 30 seconds. Anything longer than this will make the stars look like little lines rather than dots. This is only if the aurora is not very strong. The stronger it gets the shorter your shutterspeed with need to be. The colour will get brighter as will the sky and your image will be overexposed if you have the shutter open for too long. You can even get down to 1 or 2 seconds if it’s really bright, so you will need to experiment with shutter speeds according to the brightness of the sky.
- ISO – with my Canon 5D MK 3 and an F2.8 aperture, I shoot at ISO 1600. My partner has a Canon 6D with an F4 lens so his ISO needs to be around 3200. It will also depend on your camera as to how high you can push your ISO before losing quality of image. If I was wanting a longer exposure then I could reduce my ISO to escape having noisy images. It’s another variable that you will have to play around with.
- Set your 2 second timer or use your shutter release to prevent camera shake when pressing the button.
Focusing:
- Focusing is one of the tricky parts of night photography. The easiest way to focus is by turning your focus ring all they way to the infinity symbol which is a sideways figure 8. Once there you may need to turn it back about 1-2mm depending on your lens. Do a few test shots and zoom in to make sure the image is in focus. Alternatively, if there is a really bright star in the sky or part of the moon or a light, then focus on that. As long as you don’t move your camera more than a few metres it should stay in focus.
- Once you have found your focus, flick the switch on your lens to manual focus so that your camera doesn’t lose where you have focused by trying to re-focus. If you found your focus spot while on Manual focus then you are ready to start snapping away!
Situations:
- If the aurora is sitting above the horizon or mountains not doing much, then go for a longer shutter speed of around 30 seconds. A lower ISO of between 800 and 1600 (depending on your aperture) works best here.
- If the aurora is moving fast, with rays shooting up into the sky then you need a shorter shutter speed. Anything from 1 second to 5 seconds but a higher ISO of around 1600 depending on your aperture.
- If the activity is fairly high, there are lots of bands of purple and green , but not flickering across the sky (this is typical of an Alaskan Aurora) then a shutter speed between 10 and 20 seconds with an ISO of between 1200 and 1600 at an aperture of 2.8.
Hopefully this will set you on the right path next time you are standing under this magical display of light. Don’t forget to stop and take it all in with your own eyes rather than seeing it through the camera lens.
Have you witnessed the aurora with your own eyes or captured it on camera. I would love to know what your experience was like. If you enjoyed this article or have any questions please leave a comment in the section below.
Happy Aurora Hunting!

Hi Larissa,
We saw the northern lights when we were in Canada (Yukon) last year but I didn’t manage to get a decent shot. I had real trouble with focusing the lens (I’ve got a mirrorless Olympus). I’ve since read that you need to set focus to infinity or something?? (Sorry, I’m a total amateur photographer, hope this kind of makes sense! 🙂 )
Hi Kati! Thats awesome that you saw the Northern Lights. They are pretty special aren’t they! And yes, you need to focus to infinity. So on your lens turn the focus ring all the way until you see the infinity symbol which is a sideways 8, and then bring it back about 1-2mm. You may need to do some test shots to make sure you are in focus, but this should get you in the general vicinity of being in focus. Otherwise try and find a bright star or a light and focus on that. As long as you don’t move the camera more than a few metres it will stay in focus.:)
Ok, thanks heaps! I will need to play with my camera to work that out. Probably also didn’t help that I tried figuring everything out at 1:30 am after I scrambled out a campervan bleary eyed… 😉
I love the colours in your photos – did you do much post-processing or did they pretty much look like that when you took them?
Haha, yeah that can be a bit tricky trying to figure out settings at 1:30am!
You do have to work the image a bit to bring out all the colours. Especially because I shoot in RAW format. It looks amazing on the LCD screen on the camera because that is showing you a JPEG version of the shot. When I upload it to the computer its a lot duller because its basically the bare bones of the image. You then need to pull all the colour back out that you saw in the sky! I will do a process tutorial video this week with one of my shots! Stay Tuned….
What an amazing experience Larissa, I think the Northern Lights would have to be on most peoples bucket list!! I never knew that the aurora was white when it was faint!
It was an incredible experience Andrew. One I will never forget. And yes, its so strange that its white to begin with! 🙂