
Ive had a few people sign up to my blog recently who are total beginners and have asked for me to do some blog posts about the basics of photography. I think this is a really good idea as its great for me to refresh myself with the basics too. Sometimes I get so caught up in the technical side of things that I completely forget what I learnt in the very beginning. This post is here to help you get off “Auto” Mode and start shooting on Manual Mode. Today we are going to start with Aperture. It is one of the three elements of the exposure triangle – the other two being Shutter Speed and ISO which you can read about here and here. If you can get your head around Aperture then you are halfway to becoming an amazing photographer. It is where the magic happens by controlling the depth of field in a photograph like adding a blurry background or bringing everything into complete focus.
What is Aperture?
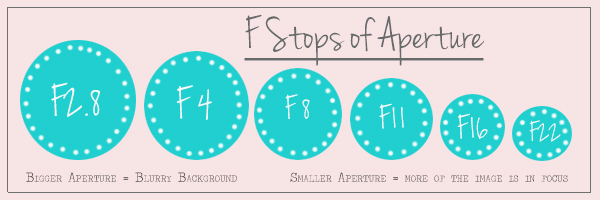
Simply put Aperture controls the amount of light entering the camera. It is the hole within the lens which light travels through into the camera body and casts an imprint upon your cameras’ sensor of what you are trying to capture. The aperture that you set controls the amount of light entering e.g. a bigger aperture = more light, a smaller aperture = less light. Aperture is referred to as F Stops. So on your camera you will see there are numbers ranging from F1.4, 2.8, 4, 5.6, 8, 11, 16, 22 depending on your lens. Now it can get a bit confusing in the beginning because F1.4 is actually a really big aperture even though it is a small number and F22 is actually a small aperture even though it is a bigger number. You will get the hang of it after a while though!
Depth of Field
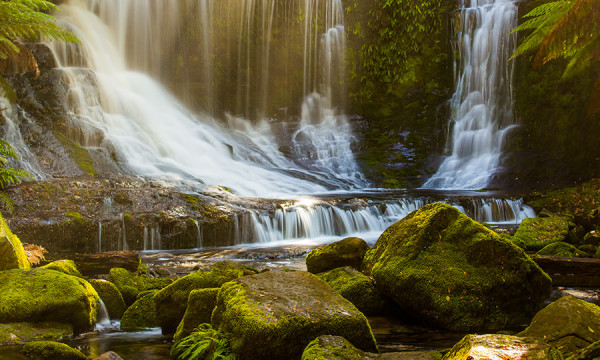
Depth of Field took me a little while to get my head around. The best way that I can explain it is Large Depth of Field is when the image is in focus all the way through. So the foreground and way into the distance like in this picture below:
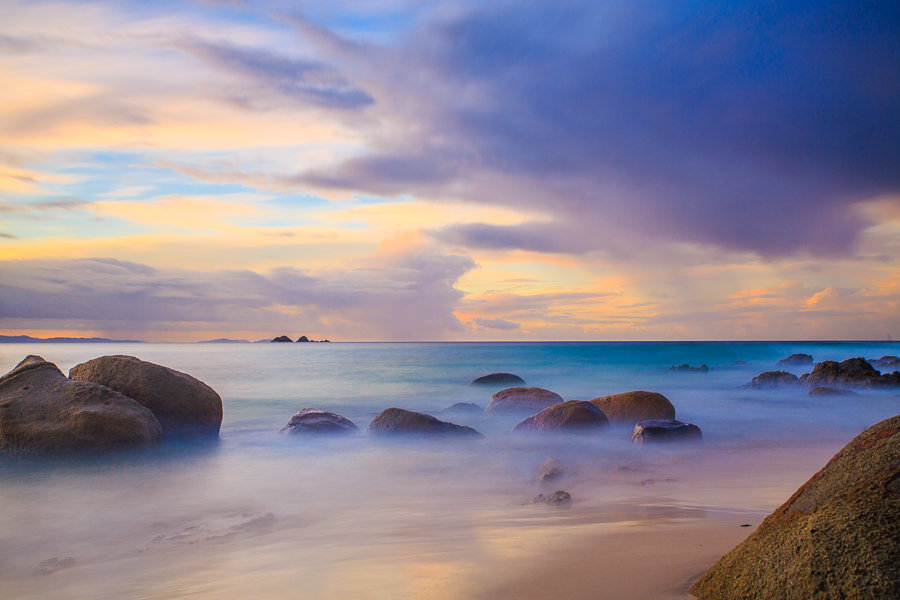
You can see that the rock in the very foreground is crisp, the rocks in the middle are still quite focused and even all the way to the little island on the horizon is still quite clear. So this is an example of Large Depth of Field and is usually what landscape photographers are trying to achieve. F Stops that are great for this would be F8, F11, F16 or F22. Bare in mind though, when you start using smaller apertures you tend to get more noticeable sensor dust on your photos for some reason. I always stick to F8 and F11 because I know that my lens performs best at those apertures.
Small (or shallow) Depth of Field is when the close up subject that you are focusing on is in focus but all the area in front of the subject and behind that subject are blurry. Like in this picture below:

You can see in the picture above of my cute little fur baby Ella that her face is in focus but the rug in front of her is blurry as are the areas to each side of her face and behind her. The numbers that you need to achieve this effect would be a big aperture of F1.8, F2, F2.8, or F4. You could even get away with F5.6 for this too. These apertures are great for shooting portraits or food or anything up close.
A better example is in the pictures below with a photo taken at each F Stop.
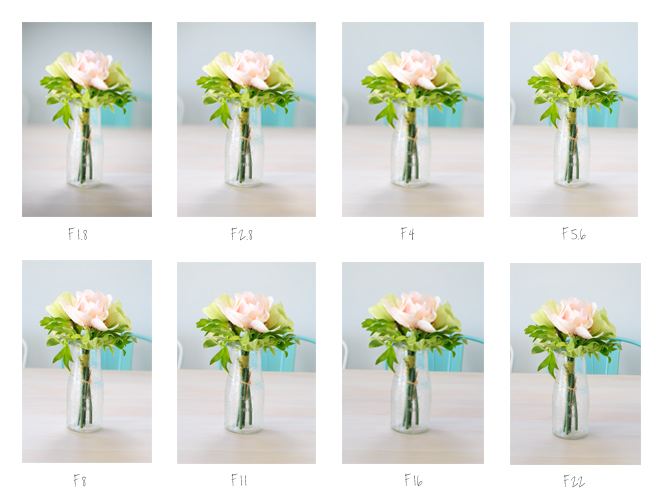
You can see the first image only has a tiny part of the glass bottle in focus and the rest is blurry. The focus gets clearer through the pictures as the F Stop get smaller and the Depth of Field gets larger. You can notice with the blue chair in the background, its quite blurry at the start at F1.8 and gets clearer until completely sharp by the time the aperture is up to F22.
As I said at the start, Aperture goes hand in hand with Shutter Speed and ISO so don’t forget to read about those in the links above.
If you enjoyed this article or have any questions I would love to hear from you, so leave a comment below or feel free to share this information with family and friends! 🙂


Great post as always Larissa. Interesting what you said about F22 etc showing up more sensor dust – had that very experience last weekend so might pull back a bit on the apertures using your advice.
One thing I would love you to share more on is how you get such amazing pastel shades in your landscapes like in the top shot plus other examples would be your shots taken at Coogee Ocean Baths , Middleton and Narrabean Ocean Baths – just flicking back through your IG shots to find these 🙂 . I’d love to know what special tips/tricks do you employ in-camera and in post processing?
Meg
Thanks for the great comment Meg! What type of camera are using? And are you using any type of filters at all? I did a post back in the early days that explains things a bit: http://larissadeningphotography.com.au/2014/05/05/secret-guide-beautiful-landscape-images-tools-need/ .Even though using filters doesn’t change the colour of the sky, they do seem to have the effect of drawing out the colour that is already present in the sky. Especially if you are doing a long exposure because the sensor is being saturated with the colours that it is capturing the longer you have the shutter open for. Of course if there is no colour then its not going to happen so you need to have a good sunset or sunrise to start with but filters definitely help! Hope this makes sense! 🙂
Thanks for ones marvelous posting! I quite enjoyed reading it, you happen to be a great author.I will be sure to bookmark
your blog and will eventually come back later in life. I want to encourage you continue your great job, have a nice afternoon!
I read this piece of writing fully regarding the comparison of most recent and earlier technologies, it’s remarkable article.