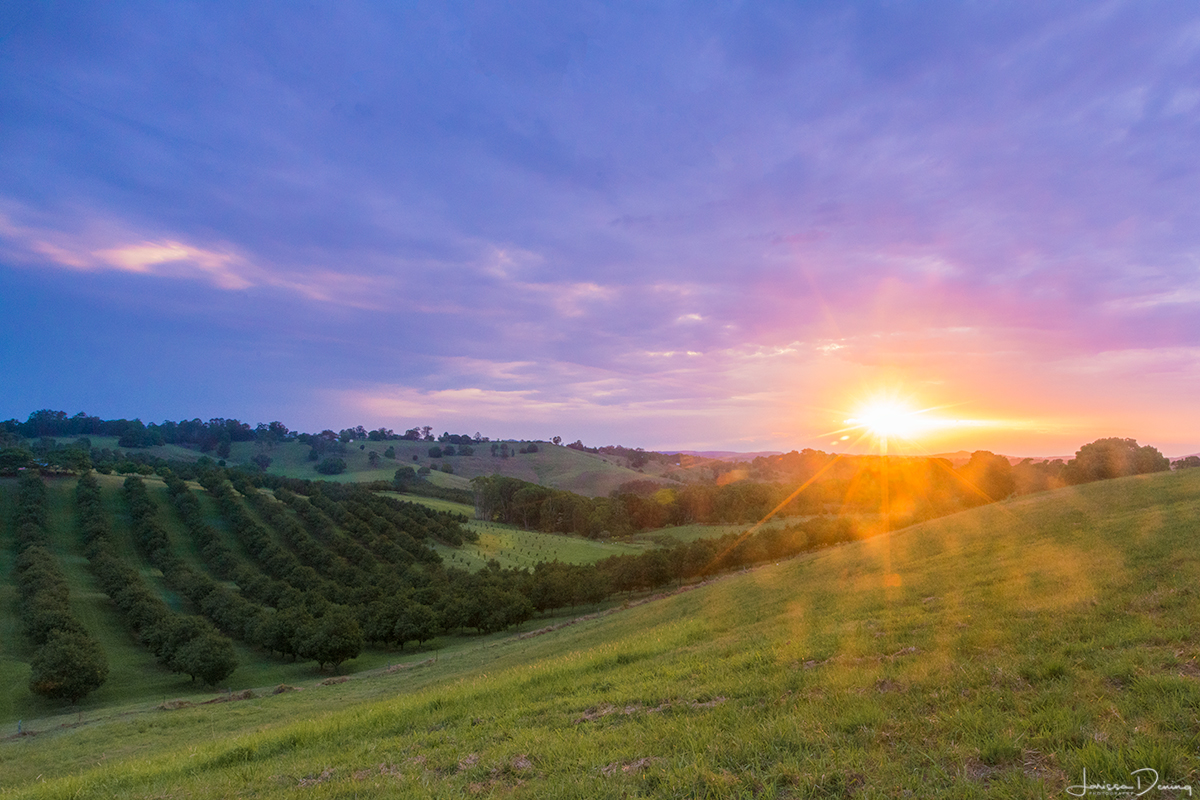
If you’re a photographer who shoots sunrise or sunset then you have probably noticed when the sun is going down or just after it has risen that it can create pretty little sun stars if it is being partially blocked by something. This can add an extra element or added interest to your landscape photos. It’s quite easy to do so let me show you how!
Placement of the Sun:
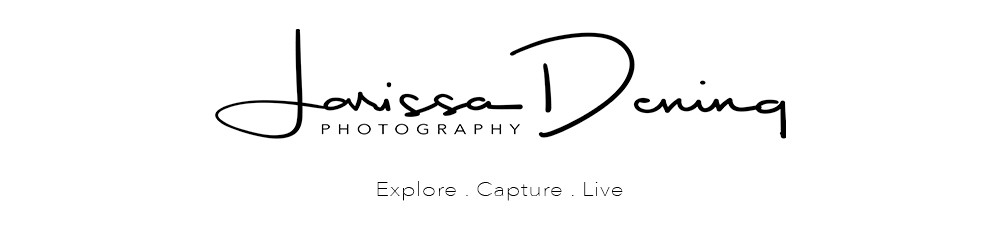
First things first when it comes to capturing a sun star is having something that will block part of the sun. An object like a mountain, a tree, a building or even a cloud are just the thing you need! Next step is wait for the sun to drop just enough to be partially hiding behind that object. You may need to move around to get the composition and sun star just right but try not to take too long as you only have a limited time before the sun is not visible anymore.
Camera Settings:
The next step is to get the right camera settings. If you are shooting in Manual Mode (which you should be ?), set your aperture to F16 or higher. Alway have your ISO at the lowest number on your camera to avoid noise in your images. If you are shooting in low light though you may need to increase your ISO to 200 or so. This will let in extra light as you are shooting at a small aperture.

The right lens:
The lens you are using makes all the difference as to whether you can capture a sun star or not and how many points it will have. If you are using lower quality lenses, your sun star will be small and not overly visible. The better quality lens you are shooting with the better the sun star will be. Some lenses are known to create awesome sun stars like the Canon 16-35mm F2.8 which is what I captured most of the ones in these photos with. My Sony 16-35mm F4 that I shoot with now captures sun stars that I am still happy with.
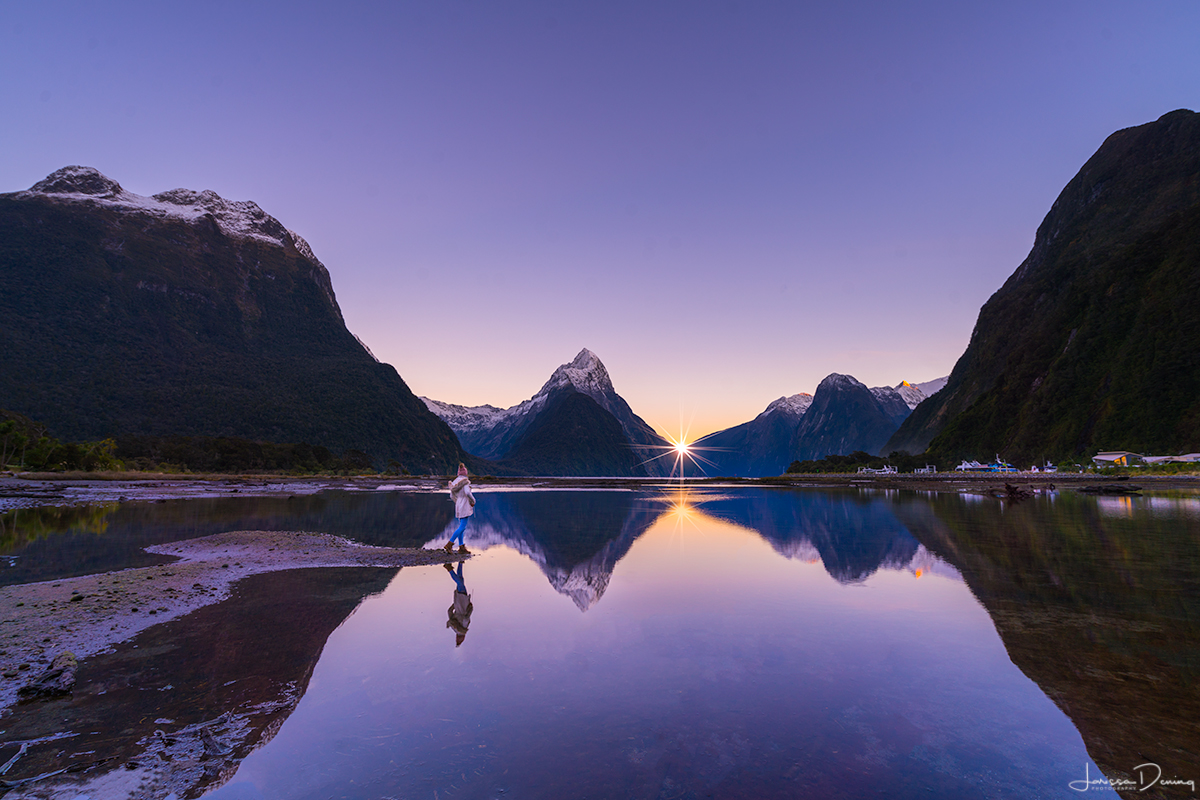
The number of aperture blades that a lens has will determine how many points your sun star will have. If there is an even number of blades then that’s how many points you will get on your sun star but if your lens has an odd number of blades then you will get double the amount of points.
Quality of light:
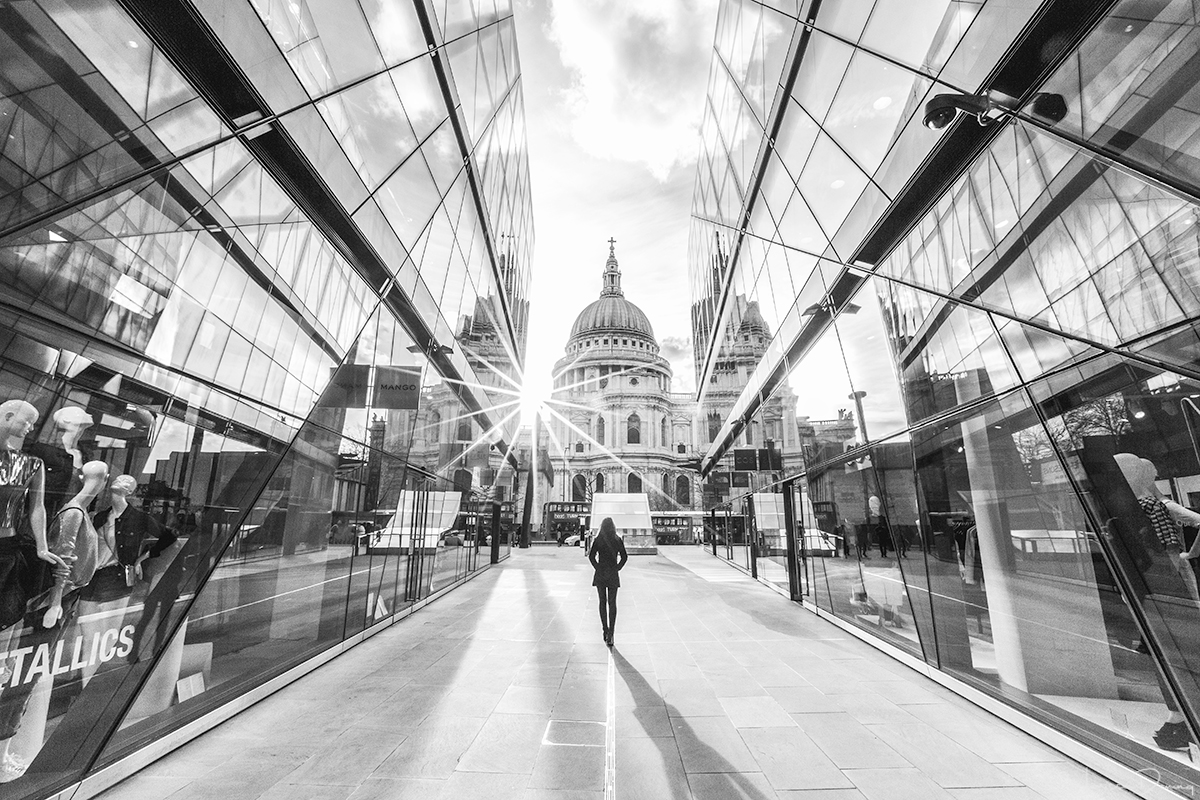
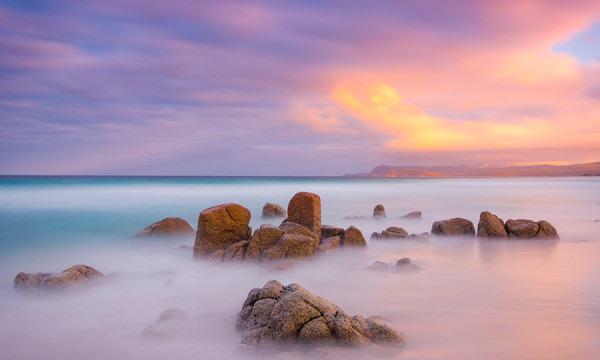
As with all photography, the quality of light has a big impact on your images. Haze, smoke and fog can reduce the sharpness of your sun star. As I said above you can get a sun star from the sun being partially hidden by a cloud but it will soften the effect like in the image below.
So there you have it. Pretty simple. I hope you enjoyed this quick little tutorial. Have you been able to capture any sun stars in your images? If so I would love to know, so leave a comment below! 🙂


Awesome, informative and truly amazing as always Larissa. The way you explain photography principles and make learning so easy is another part of what makes your blog such an incredible place to stop, to read and be amazed by your ability to capture the beauty of the world and share it with ua! Thankyou once again. ????
Thanks so much for stopping by and taking the time to read and comment Anthony! I really appreciate it. I’m glad that you enjoyed the blog and find it easy to understand. It’s nice to know we have a mutual appreciation for Guns and Roses too! ?????