Recently I have been dabbling in surf photography. The quicksilver pro 2015 has been on at Snapper Rocks, Coolangatta and I was determined to get a photo of Kelly Slater. I mean I was prepared to act like a screaming teenager and chase him down the beach to get a photo of him! Unfortunately I didn’t even catch a glimpse of him. I missed him in the first round and then he got knocked out during the week a few days later. After getting over my devastation of having to wait a whole ‘nother year to see him I could help but enjoy myself at this awesome chilled out event. If you have never been to one then I recommend you check it out at least once! So how do you get awesome shots of the pro’s working there magic? Let me show you!
1. Position:
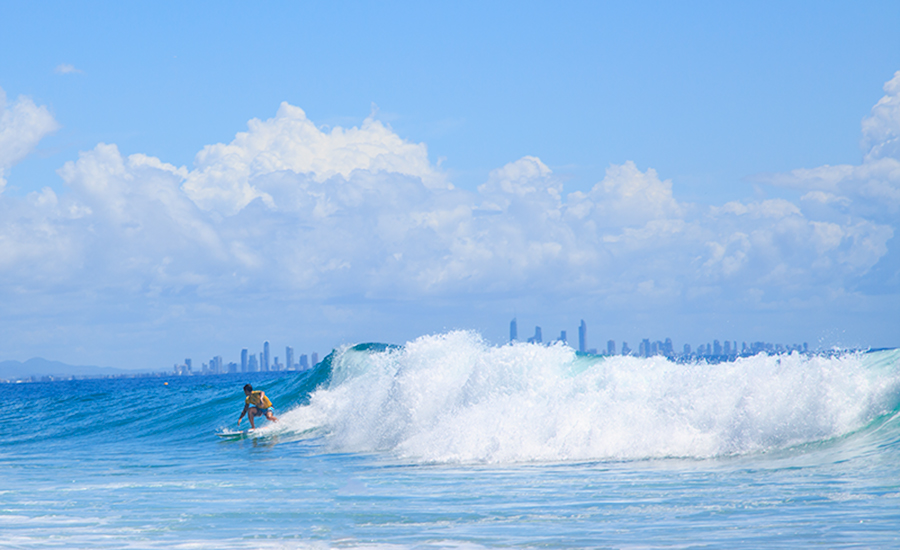
Firstly, you want to get as close to the action as possible, especially if you don’t have a very long lens. For the shot above the longest lens I had was my Canon 24-105mm lens. I had it zoomed all the way in and I was standing knee high in the water for this shot. I have also cropped it to zoom in even more on Dane Reynolds carving up the waves here. Another great position to be, is sitting on a break wall beside the action.
Last weekend I headed down to the Gold Coast again to try and capture the illusive Kelly Slater but the swell wasn’t big enough for the competition to be on so instead I sat up on the rock wall beside all the surfers at Duranbah. This gets you even close to the action like in the picture below.
Fo this shot I hired a Canon L Series – 70-200mm f2.8 lens as I was interested in buying one but wasn’t prepared to pay $2600 before trying it out first. This is a beautiful lens and certainly got me a lot closer to the action. The 2.8 aperture really gives you that beautiful portrait aspect too.
2. Settings:
I know Im always banging on about Manual Mode but when Im trying to capture fast moving objects I don’t want to miss the perfect shot because my shutter speed was too slow or there wasn’t enough light coming into the camera so the picture is too underexposed. My solution is to shoot in AV Mode which is Aperture Priority Mode. This setting allows you to choose the aperture that you want to use and the camera works out what shutter speed you need. That way I can keep panning and clicking away as the surfer is riding out the wave and my camera is deciding how fast the shutter needs to be.
Its completely up to you what aperture you want to use. If you are close enough and want to get a great portrait style pic of the surfer with a bit of a blurry background like the picture above then use a bigger aperture of f2.8 to f4. If you want to get crispness across the whole image then go for an f8 or f11 aperture.
I always try to use the lowest ISO as possible for all circumstances to avoid noise being introduced into the image. I never tend to go above 200 and if its a beautiful sunny day then ISO 100 should work fine.
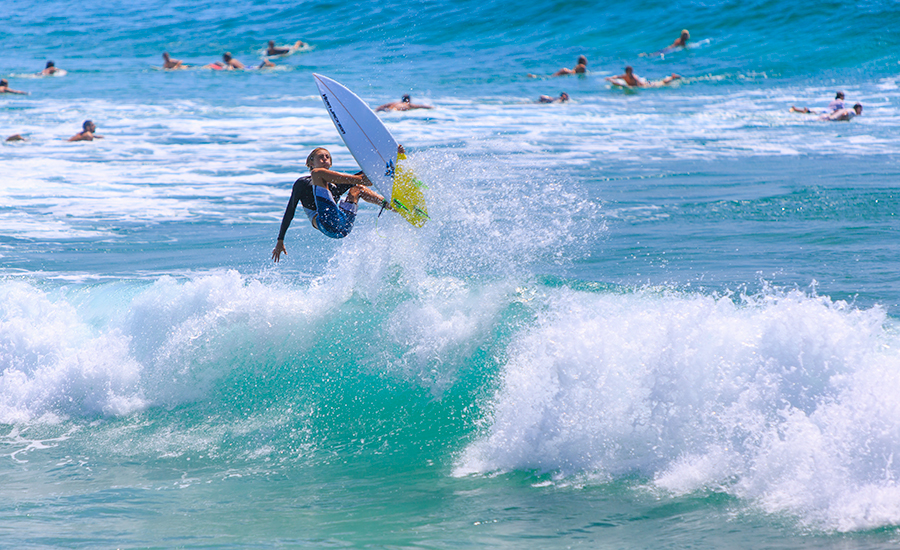
Another portrait style surfer shot of Tatiana Weston-Webb above. I chose an aperture of f2.8 so that she would be in focus but the background has that lovely blurry dreamy effect. This effect also draws your eye towards your subject.
The above image of Gabrielle Mendina was taken with an aperture of f8 so you can see that the depth of the field is crisp through the whole image. Its a good idea to think about what sort of image you want to achieve before choosing your camera settings because both styles give off a completely different look to the image.
3. Focusing:
Auto Focus is the easiest option when you are taking actions shots. You don’t have time to try to manually focus on a moving subject. Its impossible. So flick it over to Auto Focus and press the shutter half way down as you have the surfer in your view then move your camera along with the surfer as you click away. This is called panning and is the easiest way to get well focused shots.
Conclusion:
Always try to get as close to the subject as possible. A zoom lens will definitely help in this department. I much prefer my shots with the 70-2oomm lens as opposed to the 24-105mm because I am able to get that much closer and can capture a lot more detail of the surfer that I am photographing.
Decide what depth of field you want to achieve. A bigger aperture (f2.8) makes the suffer crisp and clear with a blurry background. A smaller aperture (f8) brings crispness to the whole image.
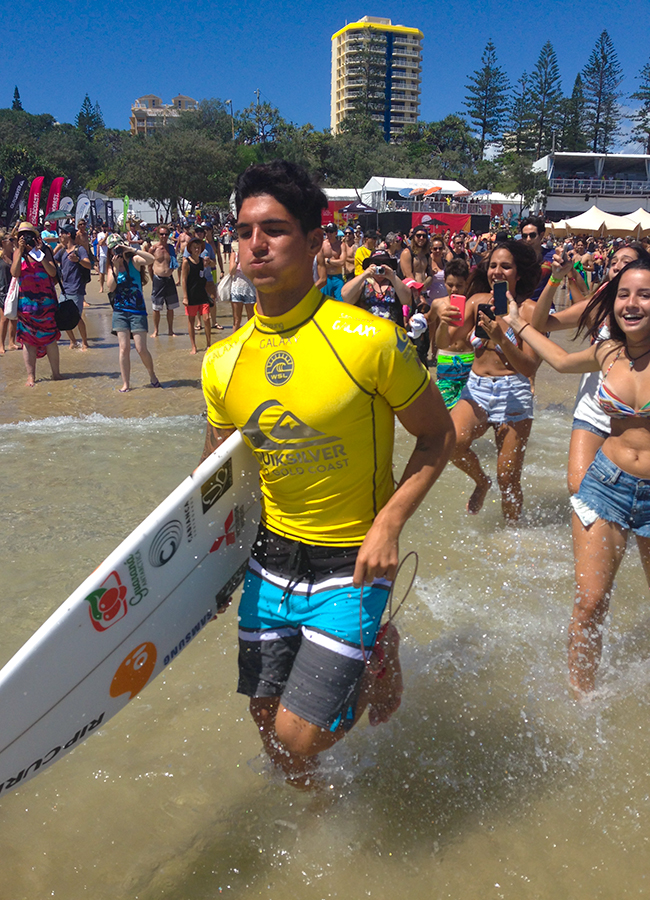
And if in doubt just be in the right place at the right time, whip out your iPhone and get a snap of Gabrielle Mendina as he runs right passed you with a group of screaming teenage fans chasing him!
I hope you enjoyed this quick little tutorial to capturing cool surfing shots. Is this something that you enjoy photographing? If so, let me know by leaving a comment below! 🙂

Awesome blog – I love the beach & surfing! I’ll have to try & get some surfing shots next time I’m there!
Thanks so much Andrew! Hopefully this blog will help you achieve so cool shots next time your at the beach!
WOW! I can’t believe Gabrielle Mendina ran right past you! You were in the right spot at the right time! I love all your surfing shots!
hahaha, it was pretty crazy Kiki! I was like “What the hell! He’s coming right at me!”